Alpine (formerly known as pine) is a full-featured text-based email client for all platforms. The original goals of the pine team were:
http://www.washington.edu/pine/overview/project-history.html
To add your Office 365 inbox to your pine configuration, you must enable "Incoming Folder Collections". This "provides a convenient way to access multiple incoming folders. It is also useful if you have accounts on multiple computers".
On anchor, type 'pine' to launch alpine.
From the main pine menu, press 'S' for Setup, then 'C' to enter Configuration. Use 'W' to search for 'incoming folders'. If necessary, press Enter to "Enable Incoming Folders Collection":
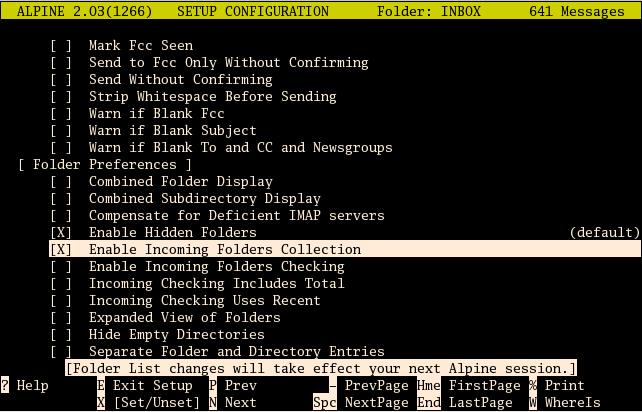
Note that you will have to restart alpine. Press 'E' to Exit setup, 'Y' to confirm the changes, then 'Q' and 'Y' to quit.
Start pine once again, and press 'Enter' twice to reach the Incoming Message Folders. Press 'A' to Add a new folder. Alpine first asks you the "Name of server to contain added folder :". Making sure to substitute your real NetID in place of <MyNetID>, type:
outlook.office365.com/user=<MyNetID>@dal.ca/ssl/norsh/novalidate-cert
and press Enter. Alpine then asks you "Folder on "outlook.office365.com/..." to add :". Here type 'INBOX' (in all capitals) and press 'ENTER'. Provide whatever nickname you would like to give this folder (e.g. 'O365') and press 'ENTER'.
Alpine should prompt you for a password: "HOST: [132.245.3.217] USER: <MyNetID>@dal.ca ENTER PASSWORD: "
Immediately enter your NetID password and press 'ENTER'. (If you wait too long, the IMAP connection will time out. Start again with the 'A' Add command).
You should now be looking at your Office 365 Inbox in Alpine.